WaiverScan - Faster Check-ins
Are you ready to take your customer check-in process to the next level? Learn how to use and optimize all the amazing features of WaiverScan to speed up your customers’ check-ins!
What is WaiverScan?
WaiverScan is an app for iOS and Android that was created to make your company’s check-in process extremely quick and easy for you and your customers. Once your customers complete their waivers online, they’re emailed a confirmation receipt with a QR code on it. Or, if your customer completes their waiver at an on-site kiosk that offers receipt printing, their receipt will feature their check-in QR code to be scanned.
As your customers arrive, you can use the WaiverScan app to quickly scan their QR code. When their QR code is scanned, their check-in status will automatically be updated on the WaiverFile check-in dashboard.
The WaiverScan app is an incredible tool that is free for our clients. One of the main benefits of this app is that it is very easy to use and that it allows for an incredibly fast, easy, and efficient check-in system. Another amazing feature is that this app works online or offline. It’s a great tool to optimize and will make your business run more efficiently, effectively, and professionally!
Hardware Support
The WaiverScan app runs on iOS and Android. Most iPhone, iPad and Android devices with cameras are supported. To scan with these devices, the app will use the built in camera(s) to scan the QR codes. For a dedicated scanning option, we recommend using the Zebra TC21 Android Handheld Barcode Scanner. This scanner is an Android mobile device with a built in laser imager that works very well for scanning codes both printed out and on device screens.
Regarding older devices, we do our best to support as many older models of these devices as we can, but new updates may require us to end support for some over time. If you have an older device and want to know if it is supported, check the app store or contact us for support.
How to Get WaiverScan
You can download the WaiverScan app on your iOS or Android device, or use it with a handheld image scanner.
iOS WaiverScan Download
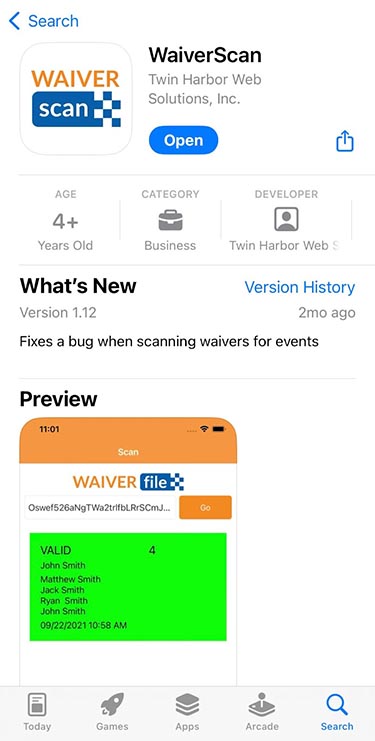
If you’re downloading WaiverScan on an iOS device, such as an Apple iPhone or iPad, you can go to the Apple App Store and search “WaiverScan” to download. Or, you can click HERE to directly view WaiverScan in the App Store. From there, you can start your installation!
Android WaiverScan Download
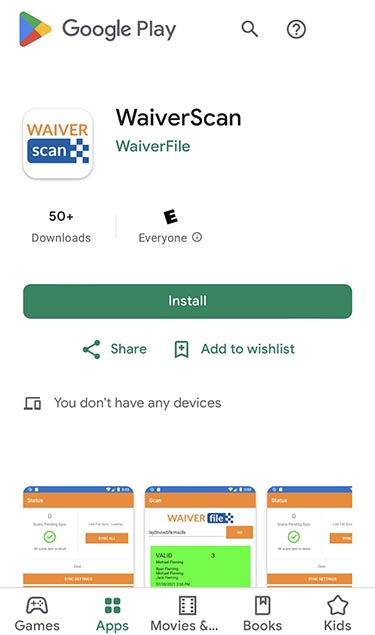
To download WaiverScan on an Android device, go to Google Play and search for the WaiverScan app to install. You can also click HERE for the WaiverScan app on Google Play.
It’s as easy as that! Once you have installed the WaiverScan app on your device, you can start the set-up process.
How to Use WaiverScan
Now that you have WaiverScan downloaded, it’s time to put its features into action!
To set up your WaiverScan app, log in with any email address on your account that has Moderator level access or higher. . Once you’re logged into your account, you can configure how you will be scanning customers' codes.
If you’re using WaiverScan through a barcode scanner, we recommend using the Zebra TC21 Android Handheld Barcode Scanner for optimal usage. The Zebra scanner can be a great asset to your company, as it’s nice to have a dedicated device for scanning people in. This handheld barcode scanner is easy to use and makes your check-in process fast and easy.
If you’re scanning waiver QR codes with this device, you will need to go to Settings and turn on Built-In Device Scanner. There is no camera on this device; instead, it uses a simple laser scanner.
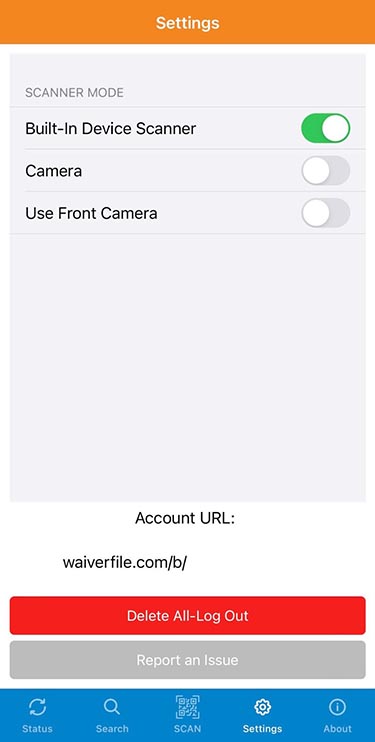
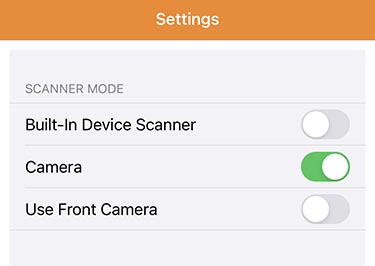
If you’re using WaiverScan on an iOS or Android device such as a phone, iPad, or tablet with a camera, then you’ll need to turn on the “Camera” in settings. To do this, go to the Settings tab located at the bottom of your app. Once there, turn on the Camera option.
Once you have your settings set in the correct way for your particular device, you can begin scanning QR codes!
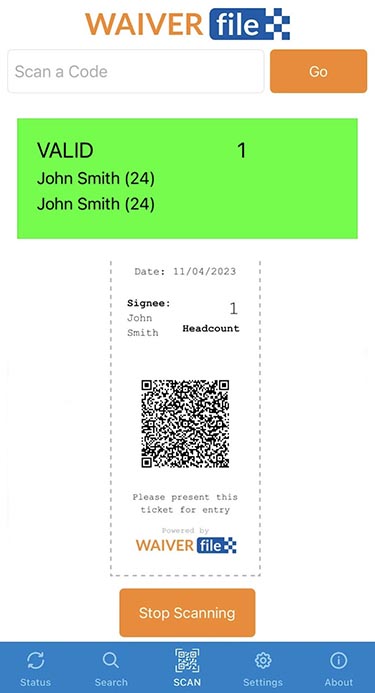
If you scan a valid QR code, a green box will appear with the name(s) of the waiver signee and a headcount. When you scan a QR code, your WaiverFile check-in dashboard will automatically update the check-in status of that signee.
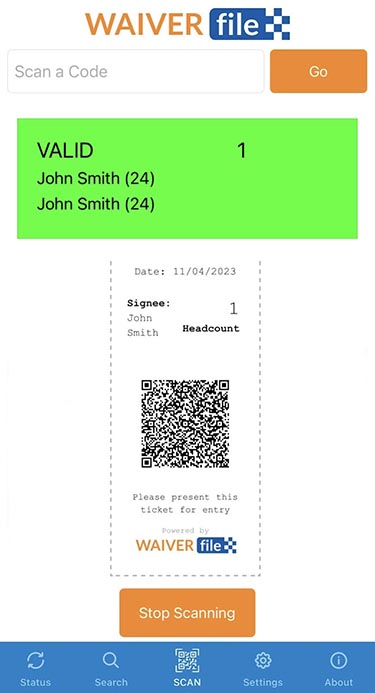
If you are using WaiverScan offline, then your dashboard will update once WaiverScan reconnects to the internet. This way, you won’t lose your data scanned on that specific device, despite being far from the internet, or in case your internet goes down at your business.
WaiverScan makes it easy for you to scan waivers quickly or on the go and ensures that your data will be synced to your main WaiverFile dashboard. This helps expedite the customer check-in process and allows your business to be more efficient—especially when busy!
Get the Most Out of WaiverScan’s Features
Check-in has never been easier with WaiverScan’s amazing features! You can upgrade the professionalism of your check-in process by utilizing and optimizing each of the many benefits WaiverScan offers.
To get the most out of the app, it’s important to know how to work and navigate each tab on the bottom part of the screen.
Status
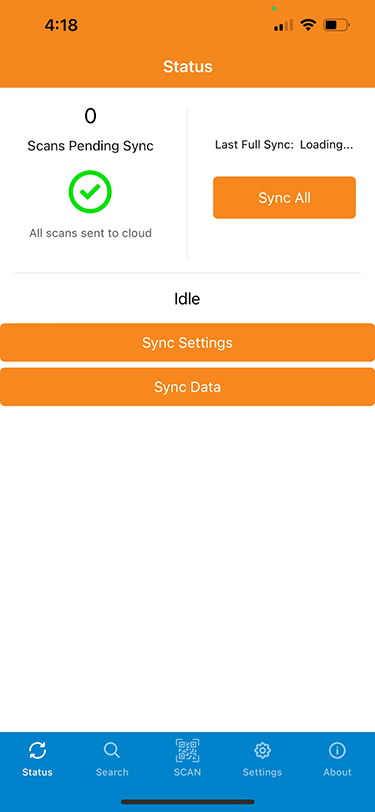
The Status tab on the bottom left of the app is where you can track whether your scans on that particular device have synced up to your WaiverFile dashboard yet.
If WaiverScan is successfully connected to the internet, then your scans will immediately update your dashboard. There is an optional feature to make an audible notification sound when new check-ins appear on your dashboard. To set this up, go to Customize >> Dashboard Layout. Scroll down to the bottom and choose alert sounds for the different events that can occur. Click Save once complete.
If you are using WaiverScan offline, then your scans will be stored on your device until they sync to your dashboard. This Status tab on your screen is where you can track how many scans you have on your device that are pending to be synced (upper left). If you reconnect to the internet, then you can use the Sync All option on the upper right corner or the Sync Data button on the bottom to attempt a full sync to your dashboard.
If the sync was successful, then your device will show that there are 0 Scans Pending Sync. This feature allows you to easily track how many scans have yet to be synced to your dashboard, so your customer is counted as checked in.
Remember, if you are off-site and offline, then your data will be safely stored on your device until you regain internet access. No need to worry or stress about any lost scans; WaiverScan works with you wherever you are!
Search
The Search tab on WaiverScan allows you to easily look up waivers by name. If you’re wondering whether a customer has already checked in or not, this is a quick view of a customer's status. When their name pops up, it’ll have an option next to it to check them in.
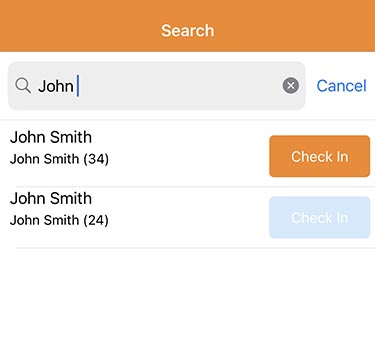
This feature leaves you never wondering the status of a customer. This is just one more way that helps speed up your check-in process!
Scan
When you open WaiverScan, the Scan tab is your default screen. This is where you can Start Scanning or Stop Scanning QR codes. When you scan a valid QR code, a green box will appear with your customer's name, or names if it’s an adult signing for a minor, with their ages and the total headcount of that specific waiver.
If the QR code is invalid, then a red box will appear saying it's invalid.
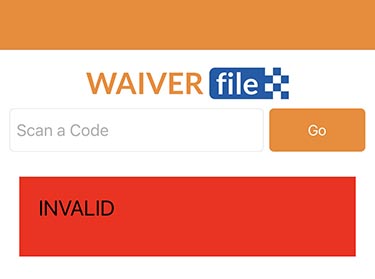
If a QR code is coming up as invalid, then this may mean it's not a WaiverFile code. Have your customer double check to make sure they have the right code and try scanning again.
For repeat entries, you can choose how to handle this situation. Under Settings >> Scanner Check-In Settings, select the Re-Entry Mode that works best for your business:
Always Allow: Codes can be scanned an unlimited number of times.
One Entry Per Waiver: Each code can be used only once. If you try to scan it again, it will show up in red and say Already Scanned. (There is a provision so if you scan the same code twice in a row quickly, it will still allow it).
One Entry Daily: Each code can be scanned just once per day. If you try to scan the same code again on the same day, it will show up in red and say Already Scanned. At the end of the day, the codes will reset and each code will be permitted to be scanned again the next day.
Settings
Your settings tab is where you’ll configure your Scanner Mode; choosing from either Built-In Device Scanner, Camera, or Use Front Camera. If you’re using a handheld barcode image scanner, such as a Zebra Barcode Scanner, then you’ll choose the Built-In Camera setting.
For devices such as a phone or tablet, you’ll choose the Camera setting, or Front Camera if you are using the front camera on a device.
At the bottom of the Settings tab, you will find your account information, such as your URL.
If you need to delete your account and the data that has been scanned on your device, then choose the red Delete All-Log Out button.
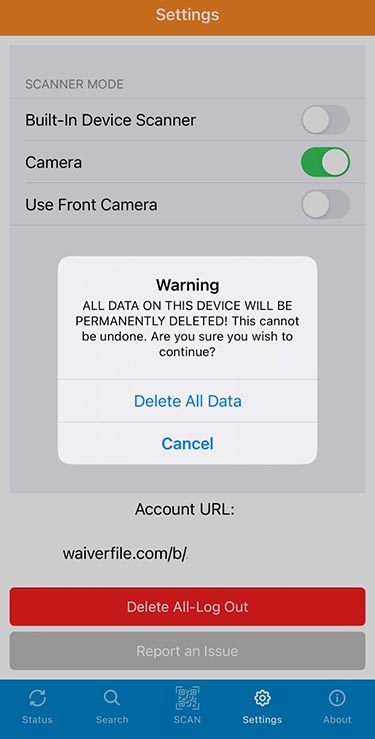
If you choose this option, it will confirm whether or not you wish to delete all your data, as once you Delete All Data it cannot be restored if it was not yet synchronized to the server.
If you are having an issue with WaiverScan, then you can Report An Issue directly on the app within the Settings tab.
>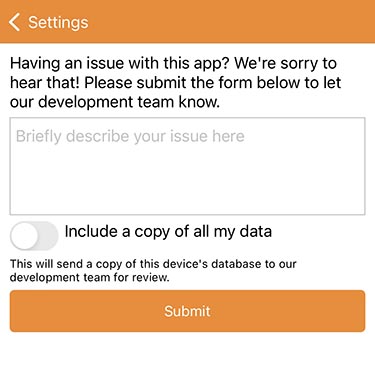
Here you can include all of the details about the performance issues you’re experiencing, and WaiverFile will do our best to ensure all bugs and issues are fixed as soon as possible!
About
If you want to learn more about WaiverScan, you can visit the WaiverFile website directly from the app.
WaiverScan is a valuable tool for your business, and we want you to take advantage of the features it offers to provide your business with a faster and better check-in process for you and your customers!