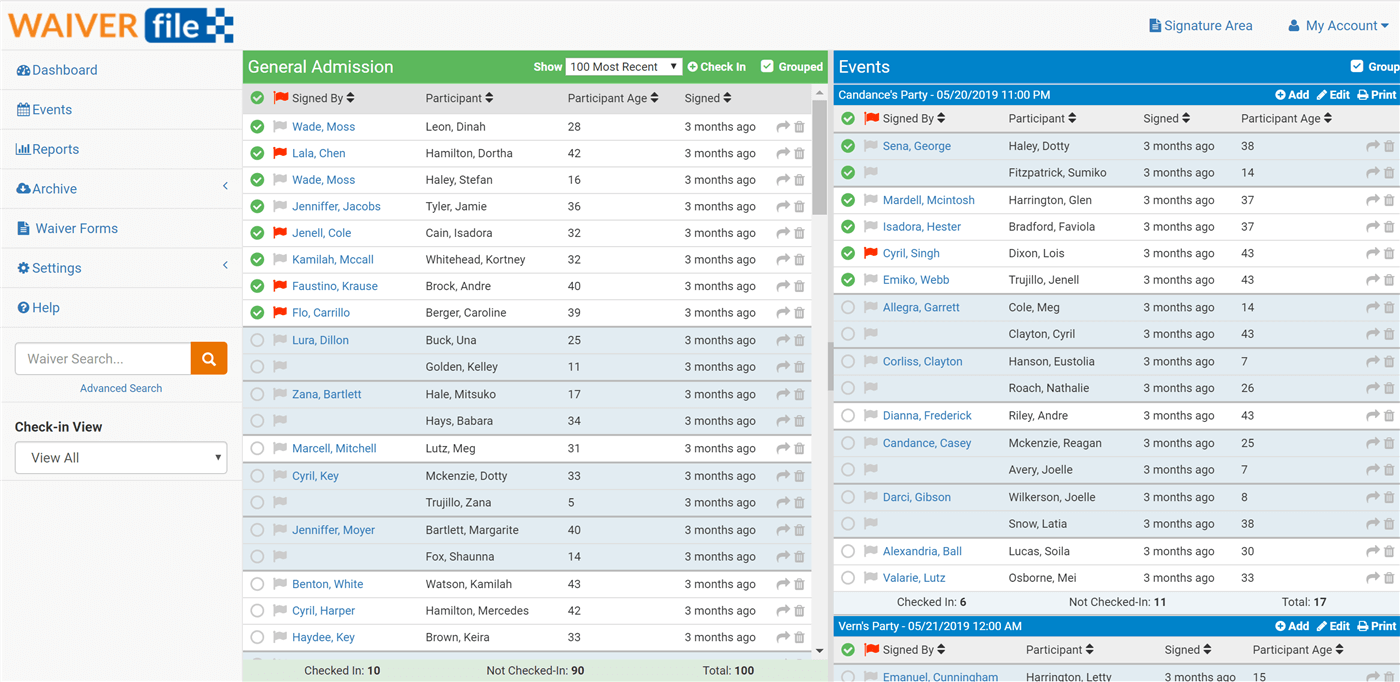
WaiverFile Check-In Dashboard
Many of our customers have facilities that offer birthday parties and group events. We’ve put a lot of effort into designing a system that not only organizes waiver forms, but ensures that the flow of collecting them is as fast and painless as possible. The idea of WaiverFile has always been to make the process easier and faster!
What is the Check-In Dashboard?
The check-in dashboard allows you to keep track of who has arrived for an event or for general admission. Using this view is simple and straightforward. When you have check-in mode enabled, you will see a checkbox next to the name of each participant. When they arrive, simply check their name. This change will be saved automatically so you can continue to click around through the dashboard – there’s no need to specifically click a save button.
Under each event, there is a row displaying totals. The number of people who have checked in, the number not checked in, and the total for that event. The same thing applies for general admission and advance signups. The totals there simply reflect the number of people being selected for the date range you have chosen.
You can choose if you want to show or hide those who have checked in. On the left-hand side of your screen, you can choose to view all participants, or just those who have checked in, or not checked in. The view will update accordingly based on this selection.
How to Enable the Check-In Dashboard
If the check-in option is not enabled in your account, do the following:
• Log into your WaiverFile admin area at mysite.waiverfile.com/admin
• Go to Settings >> Dashboard Layout
• For each section that you want to enable checkins, check the box "Include check-in boxes"
• Click Save
Now you’re ready to start tracking checkins!
